Creating an Invoice
Creating an Invoice
It is easy to start creating an invoice on Akaunting. You can add recipients, global/line discounts, and taxes.
Creating an Invoice:
Once you log in to your dashboard, go to Sales on the navigation menu bar.
- * Click Sales to reveal a drop-down menu.
- * Select Invoices.
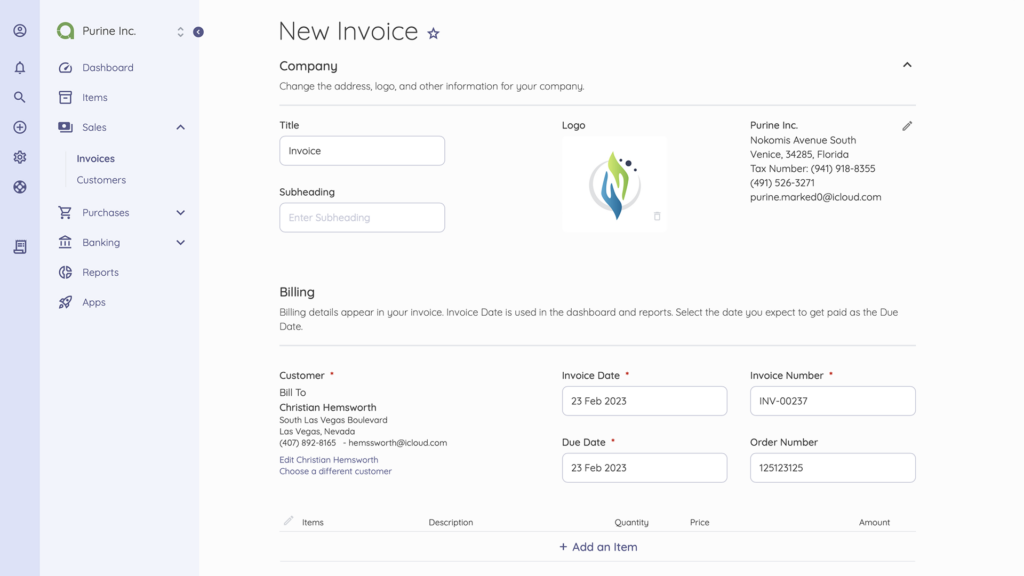
- * From the Invoices dashboard, click New Invoice.
- * Enter the required details on the Invoice creation page.
- * Invoice creation details include but are not limited to Customer, Title, Logo, Billing information, Date, Order number, and more. [Check out the details you should have in an invoice](https://akaunting.com/blog/invoice-billable-hours).
- * Add a recipient to the invoice by selecting Add a Customer.
- * Click on New Customer, and enter the customer details. The Customer’s Name and Payment Currency are required fields.
- * Then, Save.
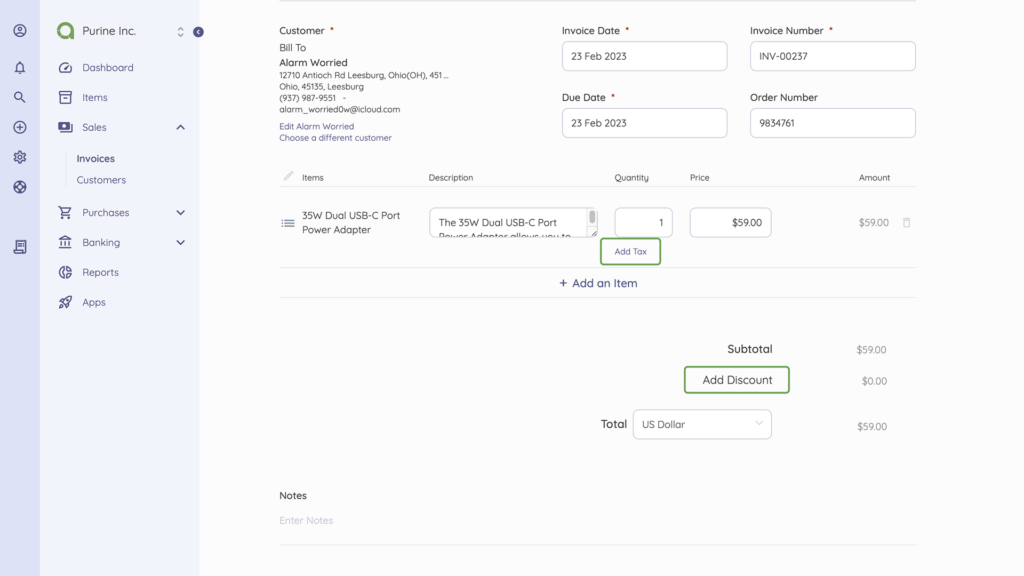
- * Click on Add an Item to add services or products. Enter the item name, description, quantity, and price.
- * The invoice total price is automatically calculated.
- * After entering the necessary details, click Save.
You can add Notes to invoices for instructions to the recipient.
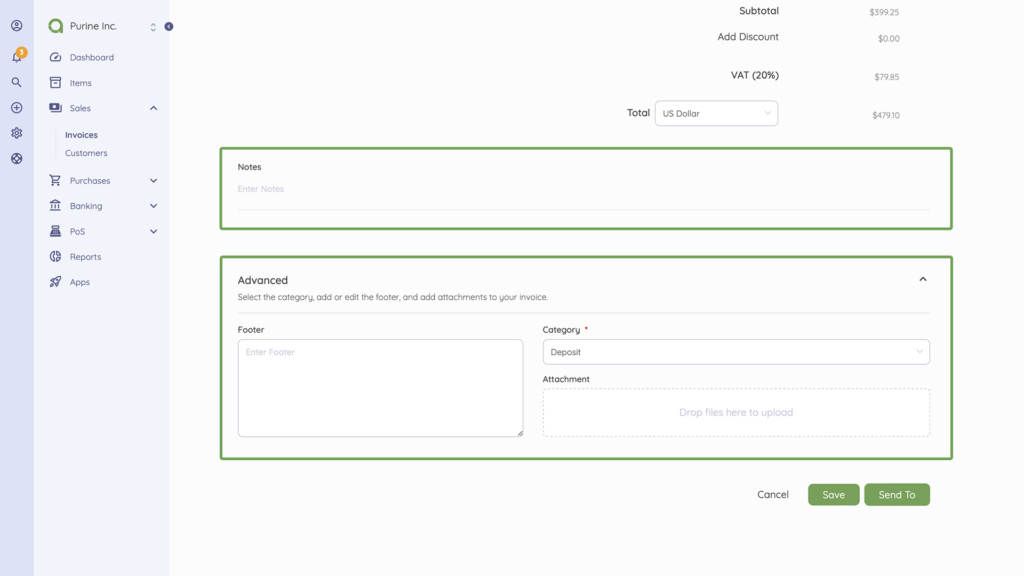
The Advanced option lets you define a Footer, Category and upload Attachments where necessary.
Adding Discounts to Invoices
When creating an invoice, you can apply a global discount or limit the discount to specific invoice items.
Discounts applied to specific invoice items are called Line discounts.
To add line discounts to an invoice, you need to enable the feature in the settings:
- * Go to Settings on the Sidebar and select [Localization](https://akaunting.com/hc/docs/settings/localization/).
- * On the Localization page, scroll down to Other > Discount Location.
- * Select Both Line and Total to have both line and global discounts.
- * Then Save.
Now, to add a Line discount:
- Select New Item while creating an invoice*.** Enter details of your product or services – name, description, quantity, and amount.- * Below the Quantity input box, click on Add discount.
- * Enter the discount in percentage or currency amount.
- * The total discount is automatically calculated on the invoice.
**Adding Taxes to Invoices**
- Select New Item while creating an invoice*.** Enter details of your product or services – name, description, quantity, and amount.
- * Below the Price input box, click on Add Tax.
- * Click on New Tax from the dropdown option and enter the required details – Name and Rate (in percentage).
- * Then, Save.
- * The added Tax is automatically applied to the total invoice amount.
**Changing the Color of an Invoice**
While creating an invoice, you can customize the color to match your customer’s brand colors.
- * On the New Invoice Page, scroll down to Advanced.
- * Click Advanced to expand.
- * Click the Color icon to see an extended color palette, or Enter the color code manually.
- * Then, Save.
Updated on: 23/03/2025
Thank you!