Creating Tickets in Helpdesk
Creating Tickets in Helpdesk
Add customer inquiries by creating tickets in Helpdesk.
You can define the category, status, and transactions related to the ticket.
Note: To use the Helpdesk features, you need to Install or Purchase the Helpdesk App.
**Creating tickets in Helpdesk**
- * Akaunting Users
- * Your Clients/Customers
Akaunting Users
Create ticket in Helpdesk as an Akaunting user
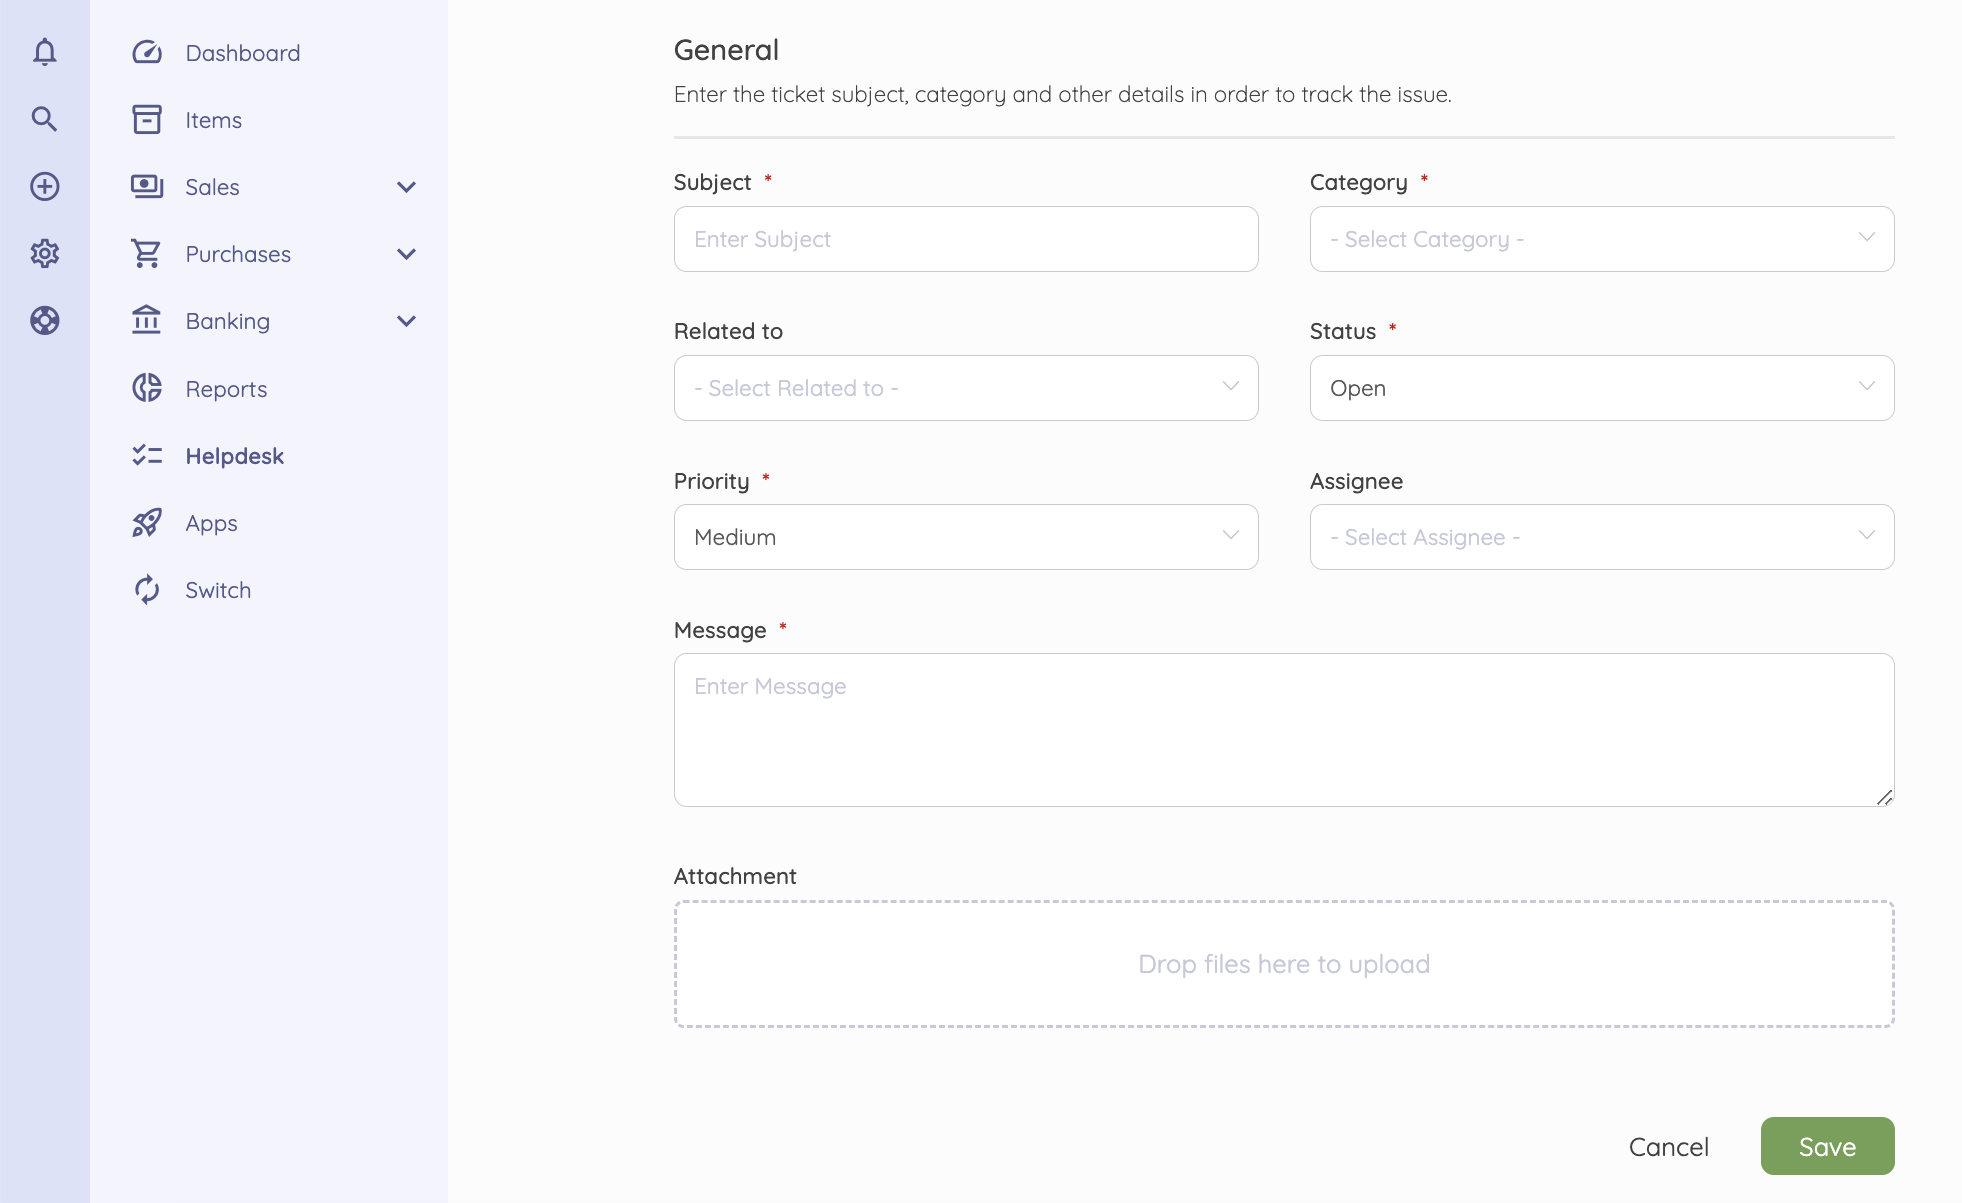
- * From your Akaunting Dashboard, Click Helpdesk on the Navigation Menu Panel

- * Select New Ticket.

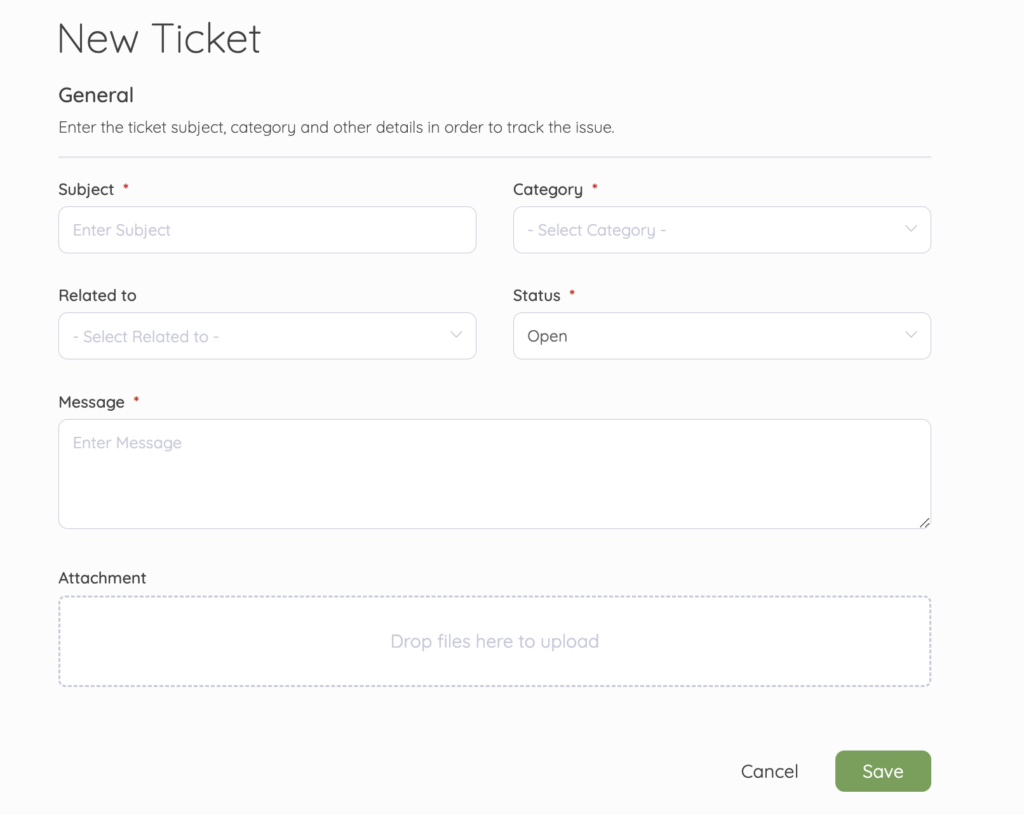
- * On the New Tickets page, Enter the Subject.
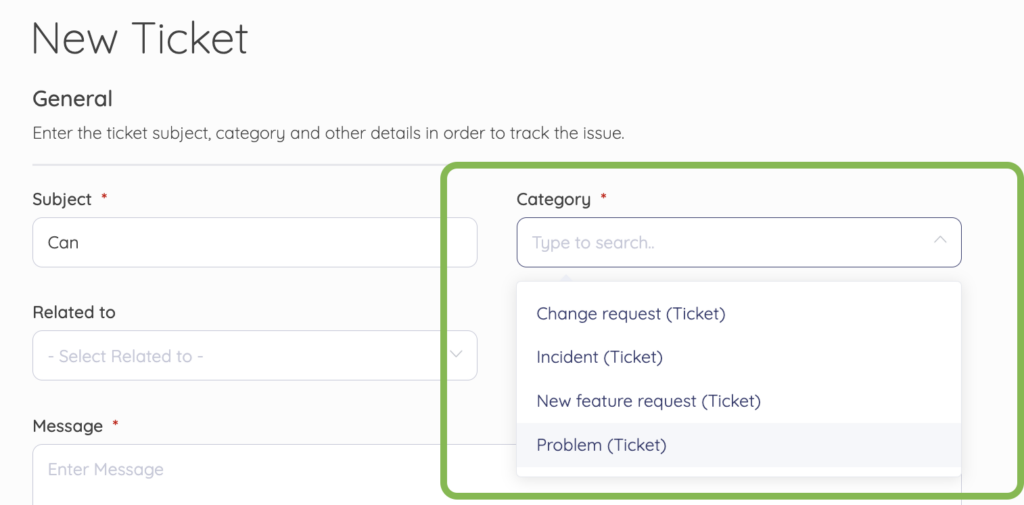
- * Select from the list of Categories (Change Request, Incident, New Feature Request, Problem). You can also add a new category.

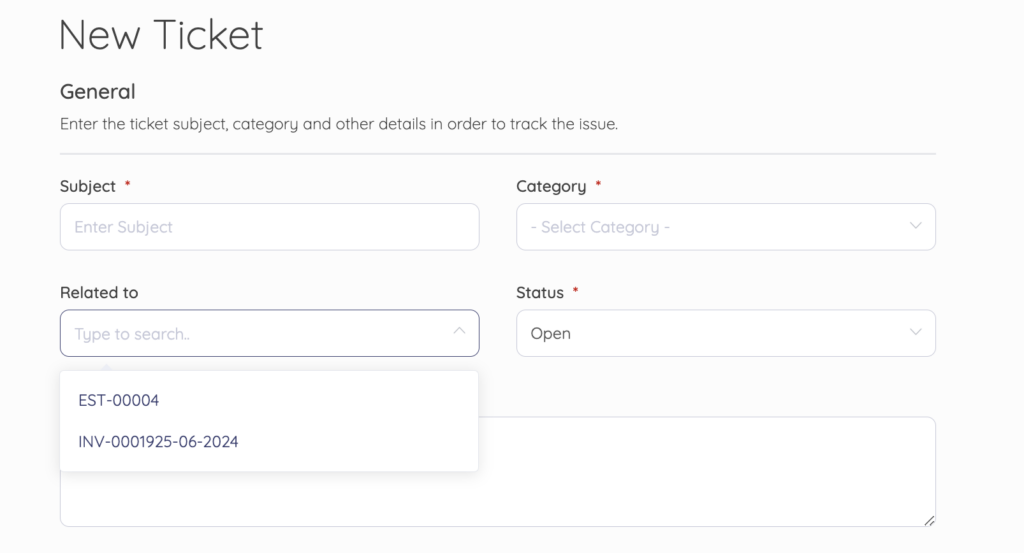
- * Select a related transaction for the ticket. Invoices, Bills, Purchase/Sales orders and other transactions are listed here.
- * Define Status
- * Choose Priority (High, Low, Medium, or Urgent)
- * Assign a team member. (This is only applicable if you have invited a team member. See details on how to invite a team member here)
- * In the Message box, enter an explanation for the ticket.
- * Add an Attachment if necessary.
- * Then, Save.

- * A new ticket is added to the tickets page.
**Clients/Customers**
Your clients can create tickets using the helpdesk app. However, you need to give the client access.
See details on how to invite a client here.
Create a ticket in helpdesk from the client portal.
- * From the Client Portal dashboard, the Client clicks Helpdesk on the navigation menu panel.

- * The Client clicks New General Tickets.

- * The Client enters details in the necessary fields

- * Write a Subject.
- * Select the Category. Unlike a User, the Client only has access to Categories created by the User and can’t create new categories.

- * Choose the related transaction if applicable.
The _Related To_ field lists all the transactions (Invoices, Bills, Payment/Sales Orders, and other transactions associated with the Client).
If a ticket is related to any transaction, the Client can select that transaction.

- * Define the Ticket Status
- * Write a detailed explanation in the Message field.
- * Upload an attachment if necessary.
- * Then, Save.
The ticket is created and added to the tickets list page.

Updated on: 23/03/2025
Thank you!